Reference Implementation
This example creates a local version of the CNOE reference implementation.
Prerequisites
Ensure you have the following tools installed on your computer.
Required
- idpbuilder: version
0.3.0or later - kubectl: version
1.27or later - Your computer should have at least 6 GB RAM allocated to Docker. If you are on Docker Desktop, see this guide.
Optional
- AWS credentials: Access Key and secret Key. If you want to create AWS resources in one of examples below.
Installation
NOTE:
If you'd like to run this in your web browser through Codespaces, please follow the instructions here to install instead.
_This example assumes that you run the reference implementation with the default port configguration of 8443 for the idpBuilder. If you happen to configure a different host or port for the idpBuilder, the manifests in the reference example need to be updated and be configured with the new host and port.
Run the following command from the root of this repository.
idpbuilder create --use-path-routing \
  --package https://github.com/cnoe-io/stacks//ref-implementation
This will take ~6 minutes for everything to come up. To track the progress, you can go to the ArgoCD UI.
What was installed?
- Argo Workflows to enable workflow orchestrations.
- Backstage as the UI for software catalog and templating. Source is available here.
- Crossplane, AWS providers, and basic compositions for deploying cloud related resources (needs your credentials for this to work)
- External Secrets to generate secrets and coordinate secrets between applications.
- Keycloak as the identity provider for applications.
- Spark Operator to demonstrate an example Spark workload through Backstage.
If you don't want to install a package above, you can remove the ArgoCD Application file corresponding to the package you want to remove. For example, if you want to remove Spark Operator, you can delete this file.
# remove spark operator from this installation.
rm examples/ref-implementation/spark-operator.yaml
The only package that cannot be removed this way is Keycloak because other packages rely on it.
Accessing UIs
- Argo CD: https://cnoe.localtest.me:8443/argocd
- Argo Workflows: https://cnoe.localtest.me:8443/argo-workflows
- Backstage: https://cnoe.localtest.me:8443/
- Gitea: https://cnoe.localtest.me:8443/gitea
- Keycloak: https://cnoe.localtest.me:8443/keycloak/admin/master/console/
Using it
For this example, we will walk through a few demonstrations. Once applications are ready, go to the backstage URL.
Click on the Sign-In button, you will be asked to log into the Keycloak instance. There are two users set up in this configuration, and their password can be retrieved with the following command:
idpbuilder get secrets
Use the username user1 and the password value given by USER_PASSWORD field to login to the backstage instance.
user1 is an admin user who has access to everything in the cluster, while user2 is a regular user with limited access.
Both users use the same password retrieved above.
If you want to create a new user or change existing users:
- Go to the Keycloak UI.
Login with the username
cnoe-admin. Password is theKEYCLOAK_ADMIN_PASSWORDfield from the command above. - Select
cnoefrom the realms drop down menu. - Select users tab.
Basic Deployment
Let's start by deploying a simple application to the cluster through Backstage.
Click on the Create... button on the left, then select the Create a Basic Deployment template.
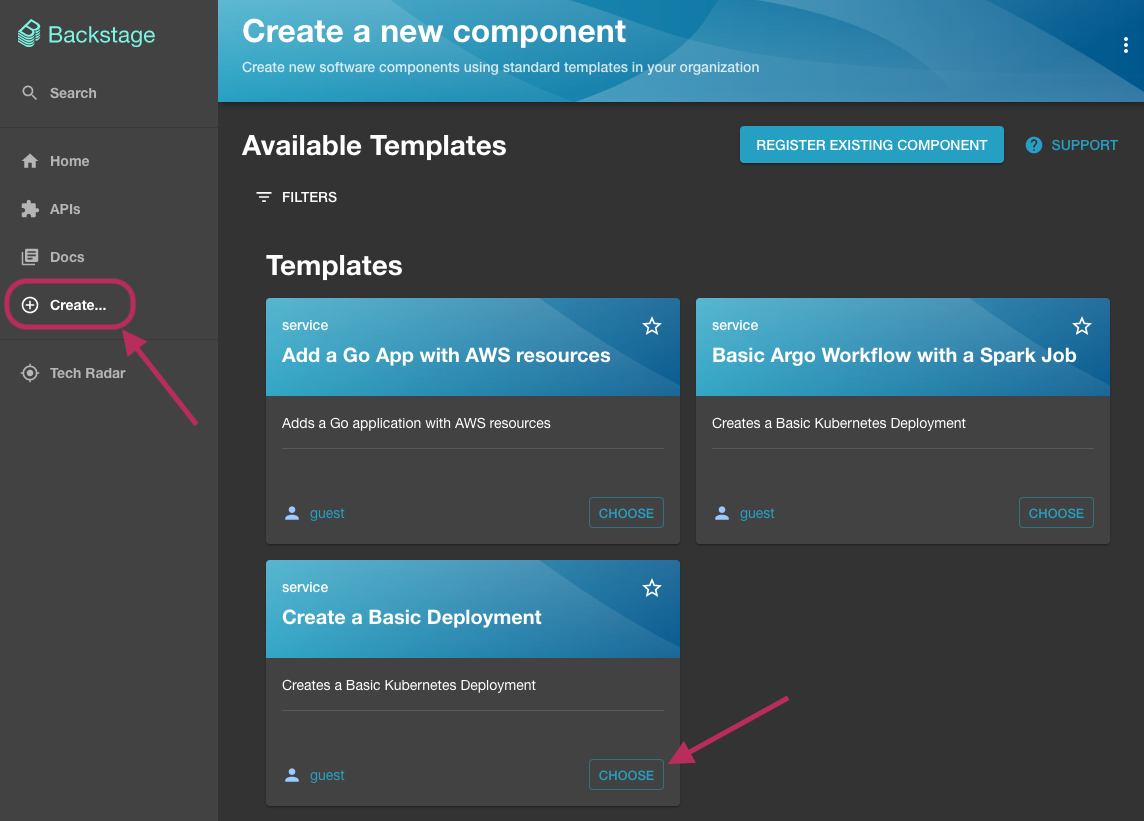
In the next screen, type demo for the name field, then click Review, then Create.
Once steps run, click the Open In Catalog button to go to the entity page.
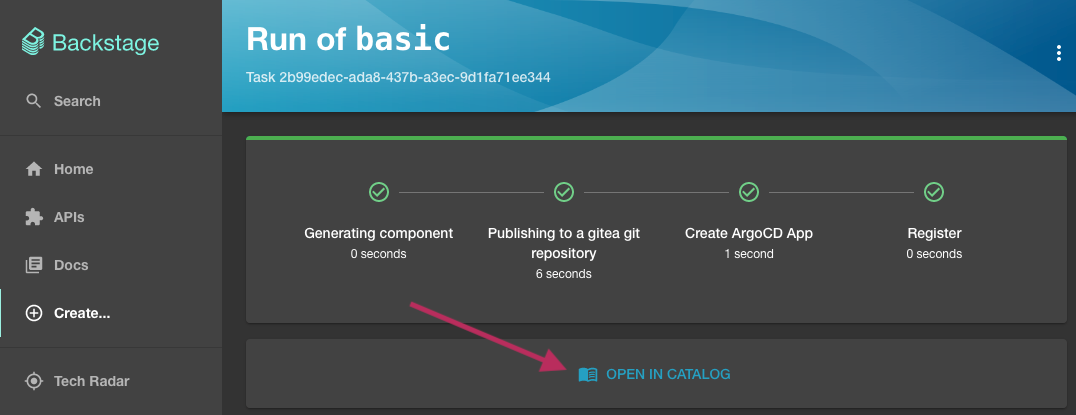
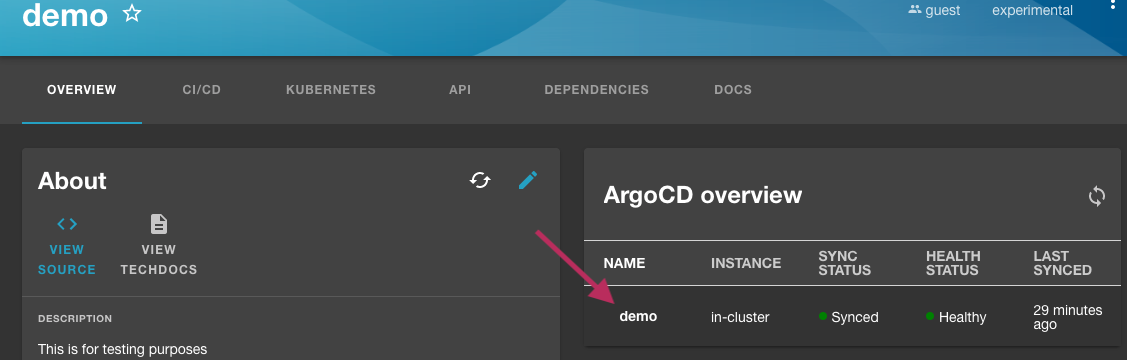
In the demo entity page, you will notice a ArgoCD overview card associated with this entity. You can click on the ArgoCD Application name to see more details.
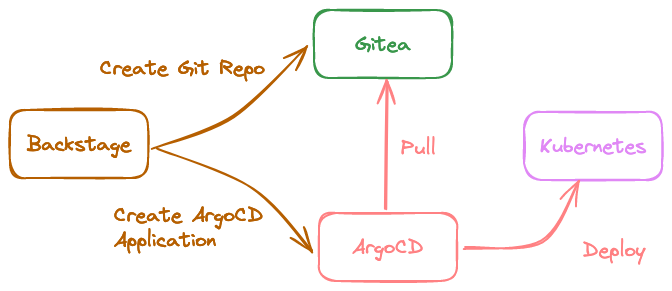
What just happened?
- Backstage created a git repository, then pushed templated contents to it.
- Backstage created an ArgoCD Application and pointed it to the git repository.
- Backstage registered the application as a component in Backstage.
- ArgoCD deployed the manifests stored in the repo to the cluster.
- Backstage retrieved application health from ArgoCD API, then displayed it.
Argo Workflows and Spark Operator
In this example, we will deploy a simple Apache Spark job through Argo Workflows.
Click on the Create... button on the left, then select the Basic Argo Workflow with a Spark Job template.

Type demo2 for the name field, then click create. You will notice that the Backstage templating steps are very similar to the basic example above.
Click on the Open In Catalog button to go to the entity page.
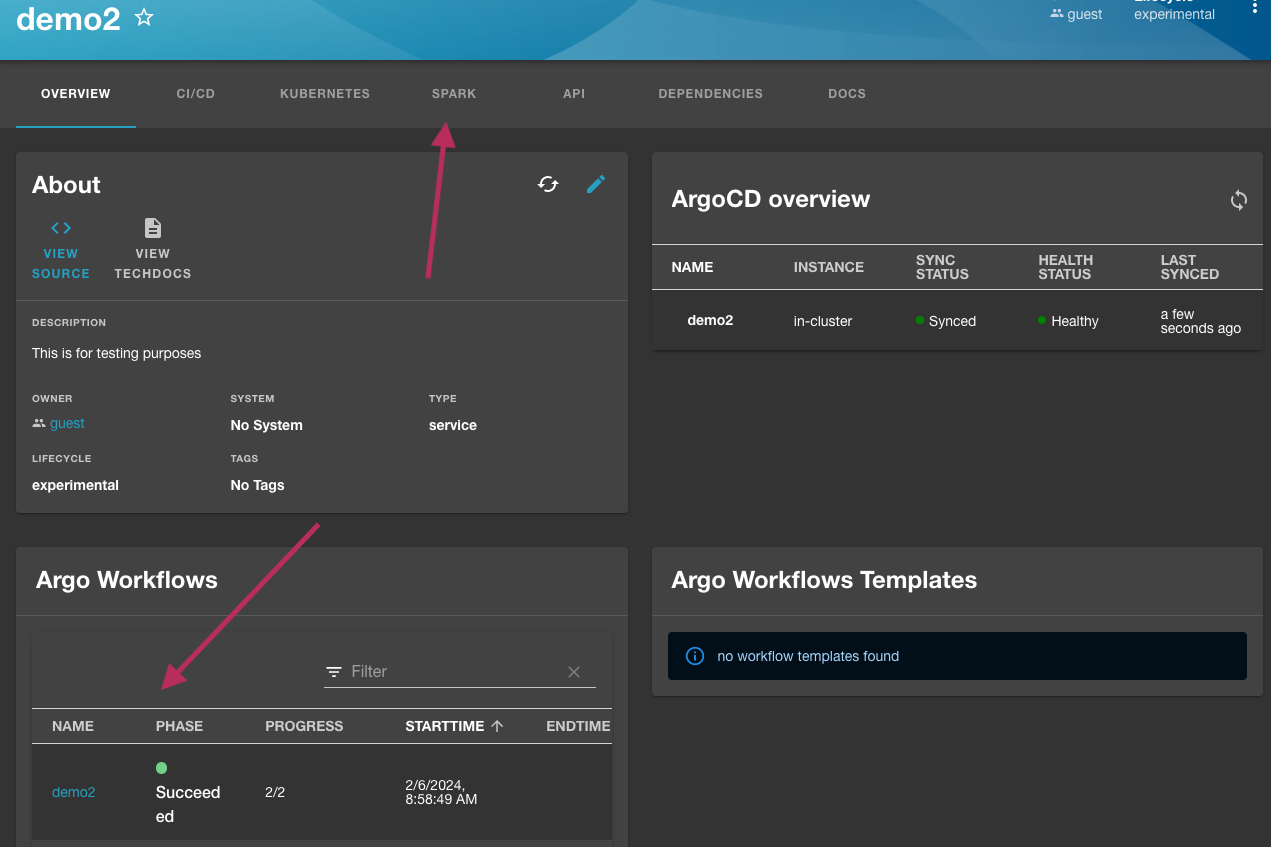
Deployment processes are the same as the first example. Instead of deploying a pod, we deployed a workflow to create a Spark job.
In the entity page, there is a card for Argo Workflows, and it should say running or succeeded. You can click the name in the card to go to the Argo Workflows UI to view more details about this workflow run. When prompted to log in, click the login button under single sign on. Argo Workflows is configured to use SSO with Keycloak allowing you to login with the same credentials as Backstage login.
Note that Argo Workflows are not usually deployed this way. This is just an example to show you how you can integrate workflows, backstage, and spark.
Back in the entity page, you can view more details about Spark jobs by navigating to the Spark tab.
Application with cloud resources.
Similar to the above, we can deploy an application with cloud resources using Backstage templates. In this example, we will create an application with a S3 Bucket.
Add the Crossplane integration as discussed here.
Choose a template named App with S3 bucket, type demo3 as the name, then choose a region to create this bucket in.
Once you click the create button, you will have a very similar setup as the basic example. The only difference is we now have a resource for a S3 Bucket which is managed by Crossplane.
Note that Bucket is not created because Crossplane doesn't have necessary credentials to do so.
If you'd like it to actually create a bucket, update the credentials secret file, then run idpbuilder create --package examples/ref-implementation.
In this example, we used Crossplane to provision resources, but you can use other cloud resource management tools such as Terraform instead. Regardless of your tool choice, concepts are the same. We use Backstage as the templating mechanism and UI for users, then use Kubernetes API with GitOps to deploy resources.
Notes
In these examples, we have used the pattern of creating a new repository for every app, then having ArgoCD deploy it. This is done for convenience and demonstration purposes only. There are alternative actions that you can use. For example, you can create a PR to an existing repository, create a repository but not deploy them yet, etc.
If Backstage's pipelining and templating mechanisms is too simple, you can use more advanced workflow engines like Tekton or Argo Workflows. You can invoke them in Backstage templates, then track progress similar to how it was described above.