Using the idpBuilder
Basic usage
The most basic command which creates a Kubernetes Cluster (Kind cluster) with the core packages installed.
$idpbuilder create
Once idpbuilder finishes provisioning cluster and packages, you can access GUIs by going to the following addresses in your browser.
You can obtain credentials for them by running the following command:
$idpbuilder get secrets
Color Output
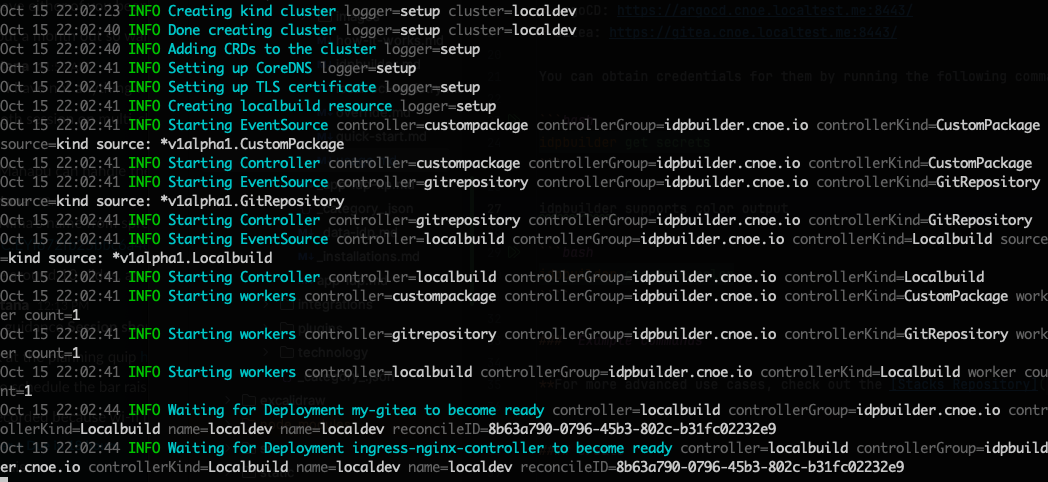
idpbuilder supports colored output with the --color flag.
$idpbuilder create --color
Example commands
For more advanced use cases, check out the Stacks Repository.
Create
Specify the kubernetes version by using the --kube-version flag. Supported versions are available here.
$idpbuilder create --kube-version v1.27.3
Specify your own kind configuration file, use the --kind-config flag.
$idpbuilder create --build-name local --kind-config ./my-kind.yaml
Override ArgoCD configmap.
$idpbuilder create --package-custom-file=argocd:path/to/argocd-cm.yaml
Example Contents of argocd-cm.yaml
This configuration allows for anonymous login
apiVersion: v1
kind: ConfigMap
metadata:
  labels:
    # Labels below are required by ArgoCD
    app.kubernetes.io/name: argocd-cm
    app.kubernetes.io/part-of: argocd
    Test: Data
  name: argocd-cm
data:
  # Enables anonymous user access. The anonymous users get default role permissions specified argocd-rbac-cm.yaml.
  users.anonymous.enabled: "true"
  application.resourceTrackingMethod: annotation
  resource.exclusions: |
    - kinds:
        - ProviderConfigUsage
      apiGroups:
        - "*"
Use a public repository to pull extra packages. See this section for more information.
$idpbuilder create -p https://github.com/cnoe-io/stacks//basic/package1
Use a private repository to pull extra packages.
$git clone https://github.com/cnoe-io/stacks-private$idpbuilder create -p ./stacks-private/basic/package1
Increase the verbosity of idpbuilder for troubleshooting.
$idpbuilder create -l debug
For available flags and subcommands:
$idpbuilder create --help
Get
Get all relevant secrets. See this section for more information.
$idpbuilder get secrets
Get secrets for a package named gitea.
$idpbuilder get secrets -p gitea
Delete
Delete a cluster named localdev.
$idpbuilder delete --name localdev
Gitea Integration
idpbuilder creates an internal Gitea server (accessible from your laptop and kind cluster only). This can be used for various purposes such as sources for ArgoCD, container registry, and more. To facilitate interactions with Gitea, idpbuilder creates a token with administrator scope, then stores it in a Kubernetes secret.
The token can be obtained by running the following command:
# print all secrets associated with gitea$idpbuilder get secrets -p gitea# get token only$idpbuilder get secrets -p gitea -o json | jq -r '.[0].data.token
Here are a some examples for using the token:
Create a Gitea Organization
$TOKEN=$(idpbuilder get secrets -p gitea -o json | jq -r '.[0].data.token' )
$curl -k -X POST \https://gitea.cnoe.localtest.me:8443/api/v1/orgs \-H 'Content-Type: application/json' \-H "Authorization: Bearer $TOKEN" \-d '{"description": "my-org", "email": "my-org@my.m", "full_name": "my-org", "username": "my-org"}'
Create a Gitea User
$TOKEN=$(idpbuilder get secrets -p gitea -o json | jq -r '.[0].data.token' )$curl -k -X POST \https://gitea.cnoe.localtest.me:8443/api/v1/admin/users \-H 'Content-Type: application/json' \-H "Authorization: Bearer $TOKEN" \-d '{"email": "my-org@my.m", "full_name": "user one", "username": "user1", "password": "password", "must_change_password": true}'
Custom Packages
Idpbuilder supports specifying custom packages using the flag -p flag. This flag expects a directory (local or remote) containing ArgoCD application files and / or ArgoCD application set files. In case of a remote directory, it must be a directory in a git repository, and the URL format must be a kustomize remote URL format.
Examples of using custom packages are available in the stacks repository. Let's take a look at this example. This defines two custom package directories to deploy to the cluster.
To deploy these packages, run the following command:
$./idpbuilder create \-p https://github.com/cnoe-io/stacks//basic/package1 \-p https://github.com/cnoe-io/stacks//basic/package2
Alternatively, you can use the local directory format.
# clone the stacks repository$git clone https://github.com/cnoe-io/stacks.git$cd stacks# run idpbuilder against the local directory$./idpbuilder create -p examples/basic/package1 -p examples/basic/package2
Running this command should create three additional ArgoCD applications in your cluster.
$kubectl get Applications -n argocd -l example=basicNAME SYNC STATUS HEALTH STATUSguestbook Synced Healthyguestbook2 Synced Healthymy-app Synced Healthy
Let's break this down. The first package directory defines an application. This corresponds to the my-app application above. In this application, we want to deploy manifests from local machine in GitOps way.
The directory contains an ArgoCD application file. This is a normal ArgoCD application file except for one field.
apiVersion: argoproj.io/v1alpha1
kind: Application
spec:
  source:
    repoURL: cnoe://manifests
The cnoe:// prefix in the repoURL field indicates that we want to sync from a local directory.
Values after cnoe:// is treated as a relative path from this file. In this example,
we are instructing idpbuilder to make ArgoCD sync from files in the manifests directory.
As a result the following actions were taken by idpbuilder:
- Create a Gitea repository.
- Fill the repository with contents from the manifests directory.
- Update the Application spec to use the newly created repository.
You can verify this by going to this address in your browser: https://gitea.cnoe.localtest.me:8443/giteaAdmin/idpbuilder-localdev-my-app-manifests
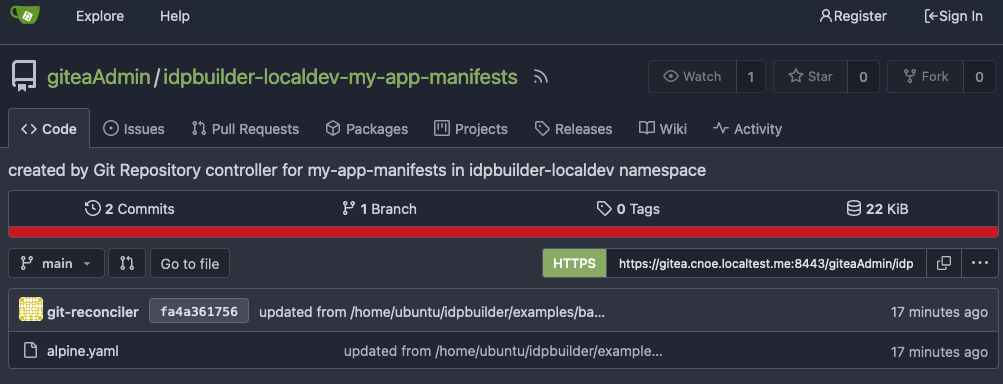
This is the repository that corresponds to the manifests folder.
It contains a file called alpine.yaml, synced from the manifests directory above.
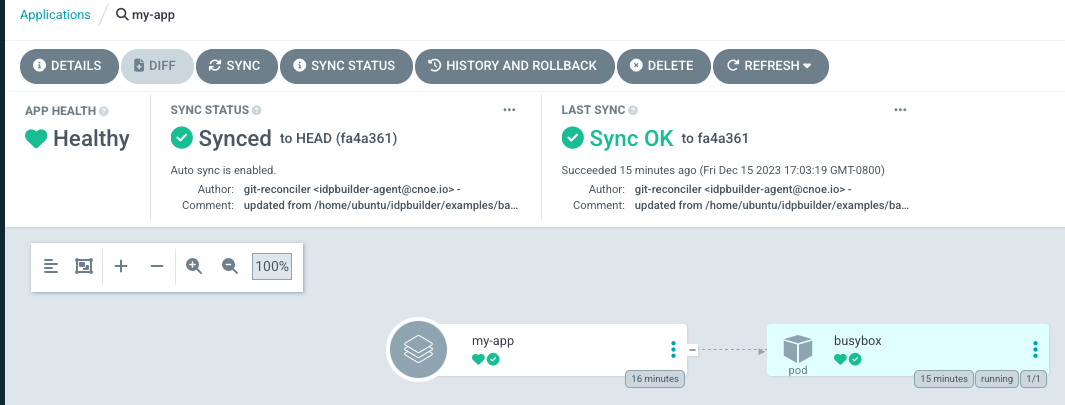
You can also view the updated Application spec by going to this address: https://argocd.cnoe.localtest.me:8443/applications/argocd/my-app
The second package directory defines two normal ArgoCD applications referencing a remote repository. They are applied as-is.
Workflows
In some situations, you need to run imperative jobs such as creating users in your service, managing secrets, or calling APIs. ArgoCD Resource Hooks are perfect for these scenarios. These hooks allow you to execute imperative workflows at various stages of the ArgoCD sync process.
For example, you can create a Kubernetes job that runs after a PostgreSQL database is created and ready by using the PostSync hook. Here's an example:
Example PostgreSQL User Creation Hook
apiVersion: batch/v1
kind: Job
metadata:
  name: create-db-user
  annotations:
    argocd.argoproj.io/hook: PostSync
    argocd.argoproj.io/hook-delete-policy: HookSucceeded
spec:
  template:
    spec:
      containers:
      - name: create-user
        image: bitnami/postgresql:latest
        command: ["/bin/bash", "-c"]
        args:
        - |
          PGPASSWORD=$POSTGRES_PASSWORD psql -h postgresql -U postgres <<'EOF'
            DO $$
            BEGIN
              IF NOT EXISTS (SELECT FROM pg_catalog.pg_roles WHERE rolname = 'myapp') THEN
                CREATE USER myapp WITH PASSWORD 'mypassword';
                GRANT ALL PRIVILEGES ON DATABASE mydatabase TO myapp;
              END IF;
            END
            $$;
          EOF
        env:
        - name: POSTGRES_PASSWORD
          valueFrom:
            secretKeyRef:
              name: postgresql
              key: postgres-password
      restartPolicy: Never
  backoffLimit: 3
More complex examples are available here
Exposing Services
Idpbuilder comes with ingress-nginx, and this is meant to be used as an easy way to expose services to the outside world. See the networking overview section for more information. By default, idpbuilder exposes the ingress-nginx service on host port 8443 and Kubernetes Ingress objects are created for core packages. For example, an ingress object for Gitea looks something like this:
apiVersion: networking.k8s.io/v1
kind: Ingress
spec:
  ingressClassName: nginx
  rules:
    - host: gitea.cnoe.localtest.me
      http:
        paths:
          - path: /
            backend:
              service:
                name: my-gitea-http
With this configuration, nginx routes traffic to Gitea service when http requests are made for gitea.cnoe.localtest.me.
Similarly, you can expose your own service by defining an ingress object.
For example, to expose a service named my-service at my-service.cnoe.localtest.me, the ingress object may look something like this.
apiVersion: networking.k8s.io/v1
kind: Ingress
metadata:
  name: my-service
spec:
  ingressClassName: nginx
  rules:
    - host: my-service.cnoe.localtest.me
      http:
        paths:
          - backend:
              service:
                name: my-service
                port:
                  number: 80
            path: /
            pathType: Prefix
Running IDPBuilder on a remote host
Option 1: SSH Port forwarding
This option is the most flexible and involves using an ssh connection to forward traffic from local ports to the server where IDPBuilder was run. First create your cluster on the server:
user@server:~/$ idpbuilder create
Once your cluster is created we need to configure our port forwards:
user@local:~/$ ssh -L 8443:server:8443 -L 32222:server:32222 user@server
-L 8443:server:8443 adds portforwarding for the ingress.
-L 32222:server:32222 adds portforwarding for the gitea ssh port.
If you want to use kubectl on your local machine first find the port the kube-api is exposed on:
user@server:~/$ idpbuilder get clusters
NAME       EXTERNAL-PORT   KUBE-API                  TLS     KUBE-PORT   NODES
localdev   8443            https://127.0.0.1:36091   false   6443        localdev-control-plane
In this case it is exposed on 36091. Then add the following to your ssh command:
-L 36091:server:36091
Finally copy the kube config from the server to the local machine:
user@local:~/$ mkdir -p ~/.kube
user@local:~/$ scp user@server:~/.kube/config ~/.kube/config
Option 2: Changing the ingress host
If you only need remote access to the ingress you can build your remote cluster using the following options:
user@server:~/$ idpbuilder create --host SERVER.DOMAIN.NAME.HERE --use-path-routing
note that this doesn't work with the --dev-password flag.